Webmaster's note: I'm presenting two reviews here, since I believe they complement each other well. The first review, by Jennings Heilig of Airway Graphics Int'l, describes the breakdown of the kit, and it taken from a preproduction test shot. My review is of a production example, and deals more with accuracy and improvement issues with the kit. Both of us are in agreement that Al Trendle of Minicraft Models deserves a big thank-you for doing this kit in the first place!
Just as I was about to upload this page today (25 July 1999) Mark Cable wrote an excellent addendum to my in-box review. You'll find his comments just below my review.--AA
Mr. Al Trendle of Minicraft has kindly supplied me with a test shot of his new injection molded 1/144 757-200 kit. As I said at the beginning, WOWOWOWOW!!! :)
Anyway, before I start, let me say that this is ONLY A TEST SHOT, so
there will undoubtedly be improvements and changes in it prior to its public
release. However, there's really not much to improve! Comparing
it to Boeing drawings and photos, Minicraft has captured the "look"
of the airplane very very well. Although the model differs from my
drawings by a couple of millimeters in length and span, I'm not going to
argue the point.
The test shot has no surface detail cut into it yet, so I can't comment
on what that may look like in the end. The detail pieces are very
well done, and (as expected) the whole thing looks very much like Minicraft's
737-300 kit. The test shot (fortunately) contained both PW and RR
engines, and, again, according to my drawings and photos, both look very
good in shape and size. Only the later style long cowl RR engines
are
provided. Not much of a problem, as Eastern and British Airways
were the main recipients of the early airplanes.
Breakdown is as you would expect. Two (rather large) fuselage
halves with the clear cockpit cab section as on the 737-300. The
stabilizers are each a single piece molding, and incorporate the correct
complex shape of the inboard leading edge where it mates to the fuselage.
Wings are upper and lower halves and feature the same interlocking tongue
arrangement as on the 737 kit. The prominent flap track fairings
are all separate pieces. Gear wells have no internal detail, but
the gear stalks, er, legs are very well molded. The nose gear leg
in particular, with all the various boxes, gizmos, lights, and lumps all
over it, looks very nice. A little wire or sprue will really
dress it up. Wheels are a bit plain (not much hub detail), but this
may also be changed before
release. The detail on the 737 wheels was quite nice.
Engines are broken down fairly conventionally. The PW2000s come as a left and a right cowl half, a fan disk, and a hot section which mounts directly to the back of the fan. The pylons for both engine types are separate and in two halves. The RB.211s are similarly molded, except that instead of a hot section you get a cylindrical affair with a depection of the last turbine stage on it. When nestled inside the cowling it looks very nice.
With all the absolutely gorgeous 757 paint schemes, this is bound to
be a big seller for Minicraft. I believe the first variant to be
issued is supposed to be the RR powered version in American markings.
My sincere
thanks to Al Trendle for (a) providing the test shot, and (b) for having
the courage to do the kit in the first place. We all need to get
a couple of dozen pre-ordered!
Jennings Heilig
In-Box Review: Minicraft 757-200, 1/144th scale
It has taken almost 17 years, but at last airliner modelers have a mainstream injection-molded kit of Boeings self-designated successor to the 727. Minicraft, in recent years, has taken a leading role in promoting airliner modeling in 1/144th scale, and their 757 kit continues their trend of filling important gaps in the coverage of modern airliners in this scale.
First of all, the fact that this kit exists at all is due to the vision of Al Trendle, Minicrafts president, who has been virtually alone amongst the mainstream model manufacturers in believing that airliner kits were viable subjects for his company to produce.
For this review I have used some 1/144th scale side-view plans, technical manual drawings, slides from my personal collection, and almost 100 detail photos of the 757.
FUSELAGE: This is molded in the standard Minicraft setup of left and right halves, with a large cutout at the front to accept the clear windshield. Unlike their 737 kit, the fuselage has scribed detail encompassing the major panel lines and access panels as well as the doors and exits. To my eye the scribing is a trifle heavy, but should look good under a coat of paint.
The entire fuselage is about 4mm too long. In comparing the fuselage with my plans, it looks like the too-great length is more or less proportional, meaning that the wing fillets are a bit too long also. This complicates shortening the fuselage to scale length. In reality, its probably not a big deal, and all but the most pure of purists will probably be better off leaving things alone!
The door/exit configuration depicted is the "three-door" variant, that has three full-size passenger doors (two forward of the wing, one aft) and two overwing exits per side. Since fitting decal door outlines over scribed outlines is always tricky, it is probably better to fill these in with filler and sand smooth before paintingand its just as well you do it, because the door outlines are not correctly placed. The forward doors on both sides are noticeably higher than the midships and aft doors, and this isnt correct. The 757 has a flat cabin floor for its full length. The midships and aft doors are closer to being correct with respect to positioning on the fuselage.
Baggage doors are correctly positioned with respect to fuselage stations, but are both too short; the scribing should be extended upwards so that the top margin of the door is just below the main deck line.
The top of the vertical fin should be parallel to the topmost horizontal scribed line; instead, the kit has it canted down slightly. Trailing edge height is correct, so youll need to extend the forward leading edge upward until you can make the fin top parallel to the scribed line. This will also have the effect of making the vertical fin appear slimmer.
Horizontal stabilizer slots are cut so that the stabilizers have a distinct negative incidence (i.e., full nose-up trim) when installed. In checking photographs of actual 757s it seems that the majority of them Ive seen on the ground have their stabilizers so positioned when parked at the gate. If one wants to change the incidence on the stabilizers, some trimming of the locator tabs will be required, but the good news is, the stabilizers should cover the locator slots completely even at neutral incidence.
Most of the scribing on the fuselage is correct in placement, and Minicraft nailed the outline of the windshield area. Boeing noses have always been tricky things to reproduce so having a correct nose straight from the box is a big plus! The clear windshield part is quite large, and provides generous margins around the windshield to ease finishing the seams. No cockpit or glareshield is provided for the inside, and with the large glass area of the 757, clear windshield builders might want to add some things up front.
FLYING SURFACES: I cant write with quite as much authority on the wings and stabilizers, since my plans only encompass fuselage side views. Just using Mk. I Eyeball and comparing the wings and stabilizers to my photos, outlines appear to be correct.
The stabilizer fillets at the base of the leading edge should flow smoothly into the fuselage contour; the stabilizers as given are rounded off at the points. Fixing that shouldnt be difficult.
Wings have separate flap hinge fairings. No wheel well detail is given, nor are the wheel wells boxed in. Trailing edges, as given, are a bit thick and would benefit from some thinning with sandpaper before assembly.
LANDING GEAR: Basic, but nice. Each strut is a single piece
molding with separate retractor arms.
The nose strut includes the landing/taxi light boxes and the steering
piston boxes. A lot more can be added, but much of it would need
to be depicted in brass to look in-scale (Danny Coremans of DACO Products,
sounds like a job for you!). Wheels appear to be scale in diameter
and thickness, and have distinct hubs.
None of the landing gear doors have surface detail on either surface. Nose gear doors appear to be correct in size and outline; main gear doors are the right length but the angled surfaces should have a slightly gentler angle than depicted in the kit. A curious anomaly is that the main gear well openings are distinctly larger than the gear doors! The gear doors are closer to being correct in size.
ENGINES (ROLLS-ROYCE): Nacelles are given for the later RB-211-535E4 engines, which have equipped all but the earliest RR-powered 757s (British Airways still flies some 757s with the earlier RB-211-535C engines). The nacelles and struts are molded in 6 parts: two strut halves, two nacelle halves, a forward compressor fan, and a hot section exhaust.
The nacelles are fine with regard to outline accuracy, but after
that a number of problems come up.
The strut doesnt fit that well to the nacelle, and does not contact
the top of the nacelle all the way to the trailing edge as it should.
To fix this will require building up the aft section of the strut.
It looks like the designers wanted to provide an intake trunk, but it only
extends halfway back to the forward compressor fan! Staying in that
area, the leading edges of the nacelle have a curious squared-off appearance,
and that will need rounding off. The compressor fan bullet is too small.
Finally, while a hot section exhaust is shown inside of the nacelle, no
attempt was made to properly depict the fairings above and below the hot
section exhaust. In Minicrafts defense it can be said that probably
only the penlight-wielders will be looking up the exhausts on the completed
models!
The struts, other than the aforementioned outline inaccuracy, are nicely scribed, and even include the prominent louvers seen on both sides. Fit to the wings is only fair at best.
ENGINES (PRATT & WHITNEY): While the P&W 757 kit isnt
out yet, I did receive a set of production-standard engine parts to review.
The breakdown of the parts is very similar to Minicrafts 737 kit: two
cold section cowling halves, a compressor fan, and a long hot section part
that cements to the back of the compressor fan.
Overall the P&W nacelle is better executed than the RR, but
it too has some problems. The same halfway-done intake trunk is provided,
and the P&W also suffers from squared-off intake lips. The fin
bullet, once again, is too small in diameter. On the plus side, fit
is better, and the strut does meet the cold and hot sections properly.
In general this is a much easier nacelle to work with than the RR nacelle.
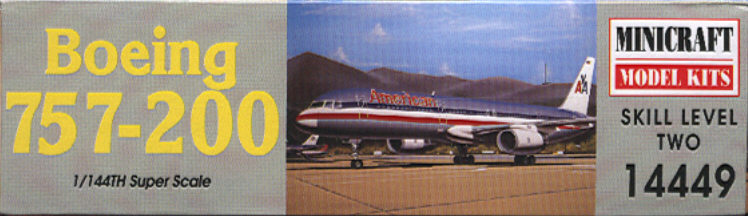
DECALS: The RR kit has current American Airlines markings for ship N682AA. These are Scalemaster decals printed by MicroscaleI guess Minicraft joined the growing list of manufacturers who got fed up with Vitachromes lack of quality control! Windows and door outlines are printed on the stripes. If you use the kit decals, you will need two sets, because the sheet incorporates door outlines to fit over the incorrectly-scribed forward doors on the kit. Markings also include overwing exit walkways. Many aftermarket decals are bound to come out for the 757, so there wont be a shortage of choices to decorate the model anytime soon!
The P&W kit will have markings for a U.S. Air Force C-32 VIP transport plane; these decals werent available for review at this writing.
INSTRUCTIONS: These are in the now-standard picture format with
little text. Some of the detail painting instructions are incorrect.
Landing gear struts are almost always light gray, not aluminum; on the
other hand, wheel hubs have tended to be painted silver on most actual
757s. The front compressor fan on both the RR and P&W engines
should be a dark anodonic gray, not aluminum; this is confirmed through
photos.
General painting instructions are nicely done and accurate.
Decal placement instructions are clear also.
OVERALL IMPRESSIONS: In general, this is a well-done kit of this important airliner. Most of the fixes I think the kit needs are relatively minor, and are not beyond the scope of modelers with some experience. As far as the important things godesign, fit, and, above all, outline accuracyMinicraft has done well, and even a stone-stock model, nicely built and finished, will look great once complete.
Andrew Abshier
I just finished my first Minicraft 757, and Andy's review is right on, with a few minor additions I would add:
1. The clear nose part needs a lot of very careful sanding and fitting to look just right, but if you take your time and don't rush it it does look very nice. Remember, this part is curved on all four attaching edges, so if you're off a little bit, you may have some big problems as a result. This isn't a kit flaw, just a basic geometry problem. Be patient.
2 The three-pronged tongue connectors for the wings don't work very well. I cut them off and glued the wings on manually. The front prong is too large for the slot it is supposed to go in, and the plastic is too thin and flexible for them to really lock the wings in place. The wings fit better without them anyway, so just chop 'em off.
3. The engines have a definite upward angle after assembly. The easiest way to fix this is to wait till it's attached, then grab the engine, hold the rear pylon firm to the wing, and bend it untill it looks right. Overall, this is a very nice kit. I had a great time building it, and it went together very well.
Mark Cable